The Ultimate Guide to Soil Preparation for Your Garden
Are your gardening endeavors falling flat? Do your plants seem lackluster and underwhelming? It might be time to dig deeper and focus on the foundation of your garden – the soil.
Before you dive headfirst into planting, it’s crucial to prepare your garden soil properly. After all, healthy soil is the key to thriving plants and a bountiful harvest. But where do you begin? What methods should you use?
In this ultimate guide to soil preparation for your garden, we’ll take you step-by-step through the process of optimizing your soil for planting success. Whether you have an open plot or a small container garden, we’ll cover it all.
From understanding the best season for soil preparation to determining the right materials and techniques, we’ll equip you with the knowledge to create the best possible environment for your plants.
Get ready to transform your garden from lackluster to lush as we explore the most essential steps, expert tips, and tried-and-true methods to ensure your garden soil is primed and ready for planting.
Step 1: Clean Up The Area
Before you start preparing your garden soil, it’s crucial to clean up the area to create a suitable environment for your plants. Follow these steps to remove weeds, rocks, and debris from the planting area:
1. Start by removing any visible weeds from the soil. Use a garden fork or a hand tool to loosen the weeds from the ground. Ensure you remove the roots to prevent any regrowth.
2. Clear any rocks or stones that may hinder the growth of your plants. Large rocks can be picked up manually, while smaller stones can be removed using a garden rake.
3. Remove any other debris, such as fallen leaves, twigs, or dead plants. Clearing away these materials will reduce the risk of pests and diseases in your garden.
By cleaning up the area, you create a clean slate for your soil preparation. This step sets the foundation for healthy plant growth and ensures optimal nutrient absorption. Now that you have a clean canvas, you’re ready to move on to the next step of soil preparation.
Step 2: Power Up Your Garden with Compost
Adding compost to your garden soil is a vital step in promoting healthy plant growth and improving overall soil fertility. Follow these simple steps to effectively incorporate compost into your garden:
1. Choose high-quality compost: Opt for nutrient-rich compost that is fully decomposed to ensure maximum benefits for your plants.
2. Determine the quantity: Apply a generous layer of compost, around 2-3 inches deep, covering the entire planting area.
3. Spread evenly: Use a garden rake or hoe to evenly distribute the compost across the soil surface.
4. Mix thoroughly: After spreading the compost, gently incorporate it into the top few inches of soil. This helps to integrate the compost with the existing soil and aids in nutrient distribution.
Remember, compost enriches the soil with organic matter, enhancing its ability to retain moisture and vital nutrients, resulting in healthier plants and improved garden productivity. So grab your compost and give your garden the nutrient boost it deserves.
Step 3: Feed Your Soil with Organic Fertilizer
Adding organic fertilizer to your garden soil is a crucial step in improving its fertility and providing essential nutrients to your plants. Organic fertilizers, such as compost, manure, and worm castings, offer numerous benefits over synthetic alternatives. They enhance soil structure, promote microbial activity, and provide a slow-release source of nutrients. By incorporating organic fertilizers into your soil, you can create a nutrient-rich environment that supports healthy plant growth and maximizes yield. Remember to follow the product instructions for the appropriate application rate and evenly distribute the organic fertilizer throughout the planting area.
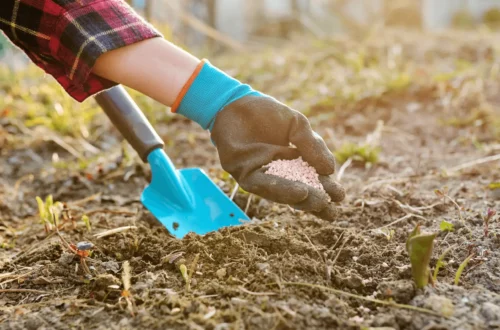
Step 4: Sprinkle In The Bone Meal Or Superphosphate
To promote root development and overall plant health, it is essential to incorporate bone meal or superphosphate into your soil preparation process.
Bone meal is derived from crushed and ground animal bones, while superphosphate is a phosphorus-rich fertilizer. Both are excellent sources of nutrients that can benefit your plants.
Here’s how you can add bone meal or superphosphate to your garden soil:
1. Determine the recommended application rate: Check the packaging instructions for the specific bone meal or superphosphate product you are using. The application rates may vary depending on the type of plant and soil conditions.
2. Sprinkle evenly over the soil: Once you have determined the appropriate application rate, sprinkle the bone meal or superphosphate evenly over the soil surface.
3. Incorporate into the soil: Use a garden rake or hand tool to gently mix the bone meal or superphosphate into the top few inches of soil. This ensures that the nutrients are distributed throughout the root zone.
4. Water thoroughly: After incorporating the bone meal or superphosphate, water the soil to help activate the nutrients and encourage their absorption by the plants.
Remember, bone meal and superphosphate provide essential phosphorus to support root development and overall plant growth. However, it is essential to follow the recommended application rates to avoid over-fertilization, which can harm your plants.
By incorporating bone meal or superphosphate into your soil preparation routine, you can create an optimal environment for your plants to thrive.
Step 5: Mix The Soil Around
Thoroughly mixing the soil, compost, and fertilizers is essential to ensure the even distribution of nutrients throughout your garden. When these components are properly blended, the roots of your plants can access the necessary elements for their growth and development. Use a garden fork or a tiller to break up any large clumps of soil and create a uniform texture. Incorporate the compost and organic fertilizers into the soil, ensuring they are evenly distributed. Mixing the soil also helps improve soil structure, water drainage, and aeration, creating an optimal environment for healthy plant growth. Remember to mix the soil thoroughly for the best results.
Also read: The Ultimate Guide to Preparing Soil for Grass Seed
Method 2: Lasagna Gardening
Lasagna gardening is a popular and effective method for preparing your garden soil. It involves layering organic materials to create a nutrient-rich bed for your plants. Here’s a step-by-step guide to implementing the lasagna gardening method:
When to Apply this Soil Preparation Method
Before we dive into the process, it’s important to note that the lasagna gardening method can be applied at any time of the year. However, it’s best to start this process in the fall so that the layers have time to decompose and create a fertile soil bed by spring planting.
Step 1: Set the Stage with Soil on Tarpaulin
Begin by transferring the soil to a tarpaulin or any portable surface near your garden plot. This will make it easier to layer the organic materials and create the lasagna garden.
Step 2: Guard Against Weeds and Boost Moisture with Newspapers
Lay a few layers of newspapers on the bottom of your prepared garden area. These newspapers will act as a weed barrier, preventing any unwanted vegetation from sprouting and competing with your plants. Additionally, they will help retain moisture in the soil.
Step 3: Supercharge Your Soil with Peat Moss
Next, add a layer of peat moss or a bale of peat moss over the newspapers. Peat moss is excellent for improving soil structure and moisture retention, creating a favorable environment for plant roots to thrive.
Step 4: Add The Compost
Spread a generous layer of compost over the peat moss. The compost will add nutrients to the soil and contribute to the overall fertility of your lasagna garden.
Step 5: Get The Grass Clippings or Leaves
Add a layer of grass clippings or leaves over the compost. This layer helps increase the organic matter in the soil and promotes the decomposition process.
Step 6: Spread The Soil On Top Of The Leaves
Finally, evenly spread a layer of soil on top of the grass clippings or leaves. This ensures that your plants have a firm base to establish their roots and grow.
Step 7: Plant or Wait; Your Choice!
Now, you have two options – you can either plant directly on top of the lasagna garden or let the layers decompose further. Planting right away allows you to take advantage of the fertile soil right from the start, while waiting for the layers to decompose can result in even richer soil over time.
Remember to water your lasagna garden regularly to keep the layers moist and aid in the decomposition process. With the lasagna gardening method, you’ll create a fertile soil bed that provides optimal conditions for your plants to thrive.
When to Apply this Soil Preparation Method
The lasagna gardening method is best applied during the spring or fall seasons. This timing allows for optimal decomposition of the organic materials used in the process and gives your garden the best chance of success. Whether you choose to start your garden in the spring or prepare it for the following year in the fall, implementing the lasagna gardening method during these times will create the best possible environment for your plants to thrive.
Also read: The Ultimate Guide to Fertilizing Soil for Healthy Plant Growth
Step 1: Set the Stage with Soil on Tarpaulin
To begin the process of lasagna gardening, you will need to transfer the soil to a tarpaulin for layering. Follow these instructions to ensure an efficient and effective soil preparation:
1. Choose a suitable location for your tarpaulin, preferably near your garden plot or area where you will be planting.
2. Spread out the tarpaulin to create a flat surface for transferring the soil.
3. Use a shovel or garden fork to carefully lift and transfer the soil onto the tarpaulin.
4. Spread the soil evenly, creating a layer that is approximately two to three inches thick.
5. Repeat the process until you have transferred enough soil to cover the desired area.
6. Ensure that the soil layer on the tarpaulin is level and uniformly distributed.
7. Once the soil is transferred, you can proceed with the next steps of the lasagna gardening method.
Remember, transferring the soil to the tarpaulin allows for easy layering and ensures that each layer will be added in a controlled and organized manner. This step sets the foundation for creating a nutrient-rich and well-structured soil bed for your plants.
Step 2: Guard Against Weeds and Boost Moisture with Newspapers
To create an effective weed barrier and promote moisture retention in your garden, laying newspapers is a simple yet efficient technique. Here’s how you can do it:
1. Gather a sufficient amount of newspapers, ensuring they are free of glossy pages or chemical coatings.
2. Clear the planting area of any existing weeds or debris.
3. Lay the newspapers directly on the soil, overlapping them slightly to prevent weeds from penetrating through.
4. Create a layer that is approximately five to ten sheets thick, ensuring complete coverage.
5. Wet the newspapers thoroughly with a garden hose or by applying water evenly using a watering can.
6. Once wet, the newspapers will adhere to the soil, forming a protective barrier against weed growth.
By implementing this step, you not only suppress weed growth but also maintain moisture levels in the soil, providing an ideal environment for your plants to thrive.
Also read: The Ultimate Guide to Making Organic Soil for a Healthy Vegetable Garden
Step 3: Supercharge Your Soil with Peat Moss
Adding peat moss or a bale of peat moss to your garden soil can significantly improve its structure and enhance moisture retention. Peat moss is an organic material that is commonly used in gardening due to its beneficial properties. It helps loosen compacted soil, allowing better root penetration and nutrient absorption by plants. Additionally, peat moss has excellent water-holding capacity, ensuring that the soil remains moist, which is crucial for the healthy growth of your plants. Incorporating peat moss into your soil preparation process will create a more favorable environment for your plants, leading to their overall success and productivity.
Step 4: Add The Compost
Adding compost to your garden soil is a crucial step in enhancing its nutrient content and overall quality. Here’s how you can effectively incorporate compost into your soil:
1. Start by preparing a generous amount of compost that is well-aged and rich in organic matter.
2. Spread the compost evenly over the top of your soil, aiming for a layer that is approximately 2 to 3 inches thick.
3. Use a garden fork or shovel to carefully mix the compost into the top few inches of soil.
4. Ensure that the compost is evenly distributed throughout the planting area, avoiding clumps or uneven coverage.
5. Once the compost is incorporated, water the soil lightly to help settle and activate the nutrients in the compost.
By adding compost to your garden soil, you provide essential nutrients, improve soil structure, and promote the growth and health of your plants. Incorporating compost into your soil regularly will contribute to a thriving and productive garden.
Also read: Essential Steps for Preparing Soil for Blueberry Plants
Step 5: Get The Grass Clippings or Leaves
Adding a layer of grass clippings or leaves to your soil can significantly improve its organic matter content. Here are instructions on how to incorporate these materials into your garden:
1. Collect grass clippings or fallen leaves from your yard or surrounding areas.
2. Shred the leaves or chop the grass clippings into smaller pieces to encourage faster decomposition.
3. Spread a thin layer of the grass clippings or leaves on top of the soil, covering the entire planting area.
4. Gently rake the layer to ensure even distribution and avoid clumping.
5. The grass clippings or leaves will break down over time, enriching the soil with vital nutrients.
6. This organic matter also helps retain moisture, improve soil structure, and suppress weed growth.
7. Ensure that the layer of grass clippings or leaves is not too thick, as excessive thickness may lead to compaction or inhibit water penetration.
By incorporating grass clippings or leaves into your garden soil, you provide additional nutrients and promote a healthier growing environment for your plants.
Step 6: Spread The Soil On Top Of The Leaves
Adding a layer of soil on top of the organic matter is a crucial step in promoting healthy plant growth. By spreading a generous layer of soil on top of the leaves, you create a favorable environment for the roots to establish and thrive.
This layer of soil serves multiple purposes. Firstly, it provides a stable foundation for the plants, allowing them to anchor securely. Secondly, it helps retain moisture, preventing excessive evaporation and ensuring that the plants receive adequate hydration. Lastly, the layer of soil acts as a nutrient reservoir, gradually releasing essential elements as it decomposes, enriching the underlying organic matter and feeding the plants.
Remember to spread the soil evenly, covering the entire surface area of the leaves. This ensures that the plants have access to nutrients and moisture throughout their root systems. Avoid piling up the soil too high, as this can lead to waterlogging and hinder root development. Strive for a uniform layer that is approximately a few inches thick.
Incorporating this step in your soil preparation process sets the stage for healthy plant growth and a productive garden.
Also read: The Ultimate Guide to Preparing Soil for Sod Installation
Step 7: Plant or Wait; Your Choice!
Now that you have diligently prepared your garden soil using the traditional method or the lasagna gardening method, it’s time to decide whether to plant right away or wait a bit longer. Both options have their merits, and the decision ultimately depends on your preferences and circumstances.
If you choose to plant immediately, you can start enjoying the fruits of your labor sooner. The nutrients and organic matter incorporated into the soil will provide an excellent foundation for your plants’ growth. However, keep in mind that the layers in a lasagna garden may still be decomposing, so there may be some initial microbial activity.
On the other hand, if you opt to wait, you allow the layers in the lasagna garden to break down further, creating an even richer and more nutrient-dense soil. This longer waiting period can result in a stronger and healthier root system for your plants, leading to improved overall growth.
Ultimately, the choice between planting right away or waiting is up to you. Consider your gardening goals and the timeline you have in mind. Regardless of your decision, implementing proper soil preparation techniques is essential for the success of your garden. So go ahead, get your hands dirty, and enjoy the wonderful journey of gardening!


You May Also Like
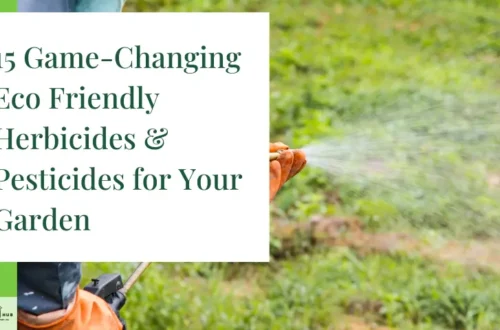
15 Game-Changing Eco Friendly Herbicides & Eco Friendly Pesticides for Your Garden

The Ultimate Guide to Preparing Soil for Grass Seed