The Ultimate Guide to Preparing Soil for Sod Installation
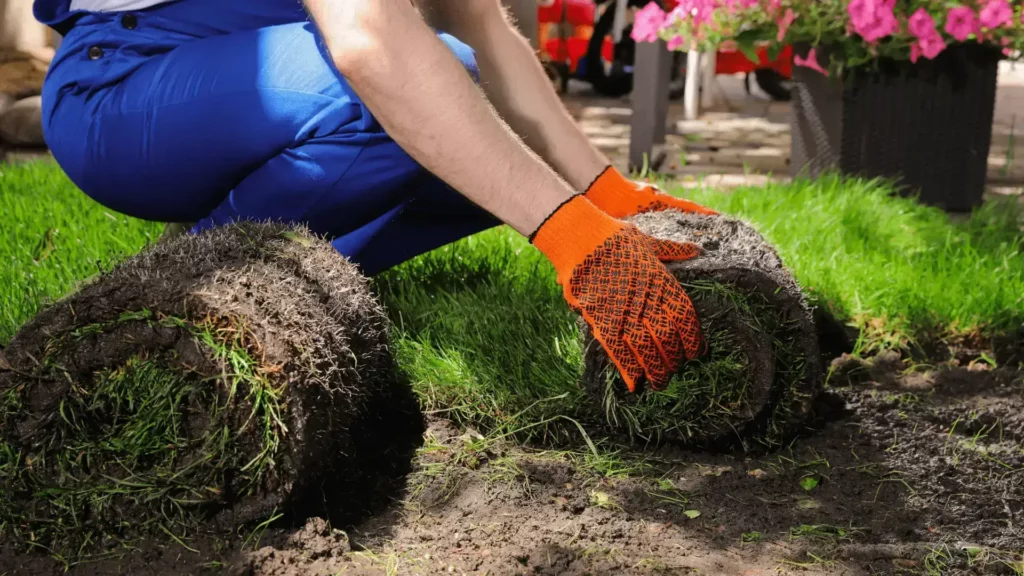
Are you dreaming of a lush, green lawn but unsure how to prepare your soil for sod installation? Don’t worry, we’ve got you covered! In this ultimate guide, we’ll walk you through the step-by-step process to ensure your soil is ready for sod, resulting in a picture-perfect lawn that will be the envy of the neighborhood.
Before you roll out the sod, it’s essential to address common pain points that can hinder the success of your installation. We’ll tackle issues like clearing the site and rough grading, adding topsoil for optimal growth, testing soil pH, and applying fertilizer. By addressing these concerns head-on, you’ll create the optimal environment for your new sod to thrive.
But it doesn’t end there! We’ll also dive into the importance of achieving a smooth and leveled surface, the impact of soil blend and amendments, and techniques for combating weeds. With our expert tips and advice, you’ll be well-equipped to tackle every aspect of preparing your soil for sod installation.
How important is soil preparation for sod installation?
Proper soil preparation is essential for a successful sod installation. Taking the time to prepare the soil ensures that the sod will establish well and result in a healthy and vibrant lawn. By properly preparing the soil, you create an optimal environment for root growth, nutrient uptake, and water drainage. This initial step sets the foundation for the long-term success of your sod installation.
Clearing the Site
Before you begin preparing the soil for sod installation, it is crucial to clear the site from any debris, rocks, or other obstacles. This step is essential for creating a clean and level surface for the sod. Remove any existing vegetation, such as weeds or grass, by using a sod cutter or a garden spade. Clearing the site ensures that the soil is free from any obstructions that could hinder the growth of the sod.
Also read: The Ultimate Guide to Soil Preparation for Your Garden
Rough Grading the Area
Before you start the soil preparation for sod installation, it’s crucial to perform rough grading to ensure a level and well-drained surface. Here are the steps to follow:
1. Clear the site: Remove any debris, rocks, and other obstacles from the area. This will provide a clean canvas for the grading process.
2. Evaluate the slope: Check for any severe slopes or low-lying areas that may affect the drainage of the sod. Make necessary adjustments to create a uniform slope for optimal water movement.
3. Use hand tools or equipment: Depending on the size of the area, you can use hand tools such as rakes and shovels or opt for tractor-mounted box blades for larger areas.
4. Rough grade the entire site: Start by loosening the soil using a hand tool or box blade. This will help in breaking up any compacted areas and promote proper root penetration and air exchange.
5. Check for a level surface: Use a long straightedge, such as a level board or string, to ensure the rough graded area is level. This will prevent any water pooling and ensure even sod growth.
By following these steps, you will achieve a well-prepared site that is ready for sod installation. Remember, proper rough grading sets the foundation for a beautiful and thriving lawn.
Tilling the Soil
Tilling the soil is an essential step in preparing the ground for sod installation. This process helps break up compacted areas and improves soil structure, ensuring optimal conditions for the sod to thrive.
To till the soil, follow these steps:
1. Start by removing any existing vegetation, rocks, and debris from the area.
2. Use a garden tiller or a rototiller to loosen the soil. Make sure to till to a depth of 4-6 inches.
3. Work the tiller back and forth in parallel rows, covering the entire area. This will help break up compacted soil and promote better root penetration.
4. If the soil is particularly compacted, you may need to make multiple passes with the tiller or use a more powerful machine.
5. Once the soil is tilled, use a garden rake to remove any remaining clumps and create a smooth surface.
Remember to avoid over-tilling the soil, as excessive disruption can disrupt the soil structure and hinder root growth. Aim for a loose, crumbly texture that provides good air exchange and water movement.
By tilling the soil, you create a favorable environment for the sod to establish strong roots and grow into a lush and healthy lawn.
Also read: The Ultimate Guide to Preparing Soil for Grass Seed
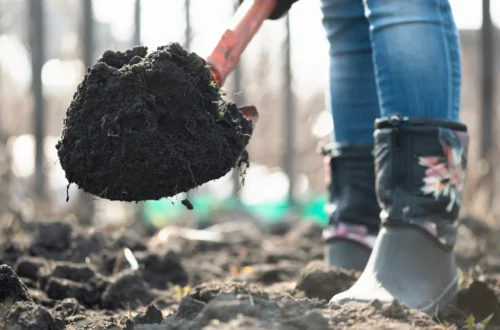
Adding Topsoil
Adding topsoil is a crucial step in preparing the soil for sod installation. By incorporating a layer of nutrient-rich topsoil, you provide an ideal growing medium for the sod to establish its root system.
During the sod installation process, the roots of the turf need to penetrate the soil and access the necessary nutrients. Adding topsoil ensures that the sod receives an ample supply of organic matter, essential minerals, and beneficial microorganisms.
The layer of topsoil should be spread evenly across the entire area where the sod will be installed. Aim for a depth of approximately 1 to 2 inches, which will allow the roots to easily establish and thrive in the newly laid sod. Make sure to blend the topsoil with the existing soil beneath to create a seamless transition.
When selecting topsoil, opt for a high-quality product that is free from weeds, rocks, and other debris. It’s recommended to source topsoil from a reputable garden center or consider using nutrient-rich compost.
Adding topsoil not only provides a fertile base for the sod but also helps with moisture retention and improves overall soil structure. Remember to avoid excessive compaction during the spreading process to ensure adequate air exchange and proper root growth.
By incorporating topsoil into your soil preparation routine, you set the foundation for a healthy and thriving sod lawn. Next, we will cover the importance of testing the soil pH to create an optimal environment for the sod’s growth.
Also read: The Ultimate Guide to Fertilizing Soil for Healthy Plant Growth
Testing the Soil pH
Testing the pH of the soil is an essential step in preparing your soil for sod installation. It is important to ensure optimal growing conditions for the sod. Here’s how you can test the soil pH:
1. Obtain a soil testing kit from your local garden center or contact your cooperative extension office for assistance.
2. Collect soil samples from different areas of your lawn using a trowel or soil probe. Aim to collect samples from at least six spots to get a representative analysis.
3. Mix the soil samples thoroughly in a clean bucket and remove any debris or stones.
4. Follow the instructions provided with the soil testing kit to measure the pH level of your soil.
5. Based on the results, you can adjust the pH level if needed. For instance, if the soil is too acidic, you may need to add lime to raise the pH. If it’s too alkaline, sulfur or other pH-adjusting products can be applied.
By testing the soil pH and making necessary adjustments, you ensure that the sod has an ideal environment for root growth and nutrient uptake. This will result in a healthy and vibrant lawn.
Finish Grading the Site
To ensure a smooth and level surface for your sod installation, it’s crucial to perform finish grading. Follow these instructions to achieve the best results:
1. Use a landscape rake or leveling tool to remove any remaining bumps or uneven areas on the soil surface.
2. Pay close attention to low spots and fill them in with additional topsoil as needed. This will help prevent water pooling and ensure even sod growth.
3. Smooth out the soil using a lawn roller. This will help compact the soil and create a stable base for the sod.
4. Take time to walk over the entire area, checking for any remaining irregularities in the soil surface. Use a hand tool to make necessary adjustments.
Remember, a properly graded surface is essential for the longevity and overall appearance of your sod. Take your time during the finish grading process to achieve the best possible results.
Also read: The Ultimate Guide to Making Organic Soil for a Healthy Vegetable Garden
Applying Fertilizer
Applying fertilizer is a crucial step in preparing the soil for sod installation. Fertilizer provides the necessary nutrients that promote healthy growth and establishment of the sod. It ensures that the newly laid sod receives the essential elements for root development and overall vitality.
To apply fertilizer effectively, follow these guidelines:
1. Use a balanced fertilizer: Choose a fertilizer with a balanced ratio of nitrogen (N), phosphorus (P), and potassium (K), such as a 10-10-10 or 20-20-20 blend. This will provide a well-rounded nutrient composition for the sod.
2. Follow recommended rates: Refer to the manufacturer’s instructions to determine the recommended application rate of fertilizer for your specific lawn and sod type. Applying too much fertilizer can cause damage, while insufficient amounts may not provide adequate nutrition.
3. Apply evenly: Use a spreader to distribute the fertilizer evenly across the soil surface. This ensures uniform coverage and prevents concentrated areas of fertilizer that can harm the sod.
4. Timing is key: Apply the fertilizer a few days before the sod installation. This allows the nutrients to penetrate the soil and become readily available for the sod’s roots upon installation.
Remember, it’s essential to water the area thoroughly after applying the fertilizer. This helps to activate and incorporate the nutrients into the soil, providing a suitable environment for the sod’s establishment.
Applying the right fertilizer at the proper time will contribute to the overall health and longevity of your new sod. By providing the necessary nutrients, you can help the sod establish quickly, develop a robust root system, and achieve a lush and vibrant lawn.
Also read: Essential Steps for Preparing Soil for Blueberry Plants
Settling the Surface
To ensure a stable and even base for your sod, it is essential to settle the surface of the soil. Here’s a step-by-step guide to accomplishing this:
1. Water the soil lightly: Before settling the surface, moisten the soil with a light watering. This will help the soil settle better and minimize any air pockets.
2. Use a lawn roller: A lawn roller is a useful tool for settling the surface evenly. Roll the lawn roller over the soil, applying gentle pressure. This helps to compact the soil and create a smooth, level surface.
3. Repeat the process: If necessary, repeat the process of watering and rolling until the surface is fully settled and leveled. Pay attention to any uneven areas or depressions and focus on smoothing them out.
4. Check the surface: Once you’ve settled the surface, take a walk across the area to ensure there are no noticeable bumps or uneven spots. If you find any, lightly tamp them down with a rake or hand tamper.
Remember, a properly settled surface provides a solid foundation for your sod, promoting even growth and preventing issues such as uneven turf or poor drainage. Take the time to settle the surface thoroughly, and you’ll be rewarded with a beautiful and long-lasting lawn.


You May Also Like

Creating a Pollinator Garden: 10 Essential Tips
The Ultimate Guide to Preparing Your Garden Soil for the Next Year