The Ultimate Guide to Preparing Soil for Grass Seed
Are you dreaming of lush green grass that makes your neighbors envious? Well, the secret to achieving a healthy and vibrant lawn lies in one crucial step: preparing the soil for grass seed. But where do you start? Don’t worry, we’ve got you covered!
In this ultimate guide to preparing soil for grass seed, we’ll walk you through the step-by-step process and provide you with valuable tips to create the perfect foundation for a beautiful lawn. From soil testing and analysis to soil amendments and fertilization, we’ll cover it all. By the end of this guide, you’ll be equipped with the knowledge and know-how to ensure successful grass seed germination and growth.
Why is soil preparation so important, you ask? Well, it sets the stage for your grass seed’s success. The right soil conditions create a welcoming environment for your seeds to take root, establish a strong foundation, and thrive. With the right soil preparation, you’ll be well on your way to a future lawn that’s the envy of the neighborhood.
So, let’s dive in and explore the secrets to creating the best possible soil for your grass seed.
Introduction to Preparing Soil for Grass Seed
Properly preparing the soil is the foundation of a successful grass seed germination and growth. By taking the time to prepare the soil before seeding, you can create optimal growing conditions for your grass and ensure a beautiful and healthy lawn. Here’s why soil preparation is crucial:
1. Promotes Root Development: Preparing the soil allows the grass seed to establish strong and healthy roots, which are essential for the plant’s growth and stability.
2. Enhances Nutrient Availability: Well-prepared soil provides an ideal environment for the grass seed to access essential nutrients, promoting vigorous growth and overall lawn health.
3. Improves Water Absorption: Properly conditioned soil drains well and retains the right amount of moisture, allowing the grass seed to absorb water efficiently and reducing the risk of over or under-watering.
4. Reduces Weed Competition: Preparing the soil helps eliminate weed seeds and creates a favorable environment for the grass seed to outcompete unwanted plants, resulting in a denser and healthier lawn.
5. Prevents Soil Erosion: Adequately prepared soil is less prone to erosion, helping to retain the newly seeded area’s integrity and preventing seed displacement.
By dedicating time to soil preparation, you lay the groundwork for a vibrant lawn that will withstand various environmental challenges. The next step is conducting a soil test to assess the soil’s condition and nutrient levels accurately.
Conducting a Soil Test
Soil testing is a crucial step in preparing your soil for grass seed. This process helps you understand the current condition of your soil and its nutrient levels. By conducting a soil test, you can accurately assess whether any amendments are needed to create the optimal conditions for successful germination and growth.
The Significance of Soil Testing
Soil testing provides valuable insights into the composition of your soil and its suitability for supporting grass seed. It helps identify deficiencies or excesses in key nutrients such as nitrogen, phosphorus, and potassium. Additionally, soil tests can determine the pH level of the soil, which is crucial for nutrient uptake by the grass seed.
By understanding the specific needs of your soil, you can make informed decisions about the necessary amendments and additives to ensure the best possible growing conditions. Soil testing also helps prevent overusing fertilizers or other amendments, which can harm the environment and waste resources.
How to Conduct a Soil Test
To conduct a soil test, you can start by contacting your local county extension office. They often provide soil testing services or can direct you to a reputable laboratory. Another option is to use a DIY soil testing kit, which usually involves collecting soil samples and sending them to a laboratory for analysis.
When collecting soil samples, make sure to take samples from multiple areas of your lawn to account for any variations in soil composition. Follow the instructions provided by the testing facility or kit to ensure accurate results.
Interpreting the Results
Once you receive your soil test results, they will typically include recommendations for amendments, based on the specific nutrient levels and pH of your soil. These recommendations may involve adding lime to adjust the pH, applying fertilizers to address nutrient deficiencies, or incorporating organic matter to improve soil structure and fertility.
Remember to follow the recommended application rates and timings provided by the testing facility or consult with a lawn care professional for guidance. Applying amendments correctly will help create a balanced and nutrient-rich soil environment, maximizing the chances of successful grass seed germination and growth.
Also read: The Ultimate Guide to Preparing Soil for Sod Installation
Amending the Soil
When it comes to preparing soil for grass seed, amending and enriching the soil is a crucial step. By addressing any deficiencies or imbalances, you can create an optimal environment for your grass seed to thrive. Here’s a comprehensive guide on how to effectively amend your soil based on soil test results and the specific needs of the grass seed.
Analyzing Soil Test Results
Before amending the soil, it’s essential to conduct a soil test to assess its composition and nutrient levels. Soil testing provides valuable insights into the soil’s pH, organic matter content, and existing nutrient deficiencies. By understanding these factors, you can make informed decisions about how to amend the soil effectively.
Addressing Nutrient Deficiencies
Based on the soil test results, identify any nutrient deficiencies and select the appropriate fertilizers or soil amendments to address them. Common amendments include organic matter, such as compost or well-rotted manure, which can enhance soil structure and nutrient availability. Additionally, consider adding specific nutrients like nitrogen, phosphorus, and potassium in the form of balanced fertilizers to support healthy grass growth.
Improving Soil Structure
In some cases, the soil may have poor structure or compaction issues, which can inhibit grass seed germination and root development. To improve soil structure, incorporate organic matter into the top layer of the soil through tilling or topdressing. This helps to promote a looser soil texture, better water drainage, and enhanced root penetration.
Applying Amendments
When applying amendments, follow the instructions on the product labels and apply them evenly across the soil surface. Use appropriate spreading techniques to ensure an even application. It’s crucial to avoid over-application, as excessive amendments can cause nutrient imbalances and impact grass seed growth.
By amending the soil based on soil test results and the specific needs of your grass seed, you can create an environment that promotes strong root development and optimal nutrient uptake. This sets the foundation for a healthy and thriving lawn. Remember to regularly monitor the soil’s condition and adjust amendments as necessary to maintain optimal soil health.
Also read: Essential Steps for Preparing Soil for Blueberry Plants
Removing Weeds and Debris
Before seeding your lawn with grass seed, it is essential to remove any existing weeds, rocks, and debris from the soil. This step is crucial for creating an optimal environment for grass seed germination and growth.
Weeds can compete for nutrients, water, and sunlight with the newly seeded grass, hindering its establishment and growth. By removing weeds beforehand, you give your grass seed the best chance to thrive and establish a healthy lawn.
Similarly, rocks and debris can create uneven surfaces that may affect the distribution of the grass seed and make mowing difficult once the lawn is established. They can also prevent the grass roots from penetrating the soil properly, leading to shallow root development.
To remove weeds, rocks, and debris, start by manually pulling out any visible weeds, making sure to remove their roots. Use a garden fork or rake to break up any large clumps of soil, making it easier to remove rocks and debris.
By taking the time to remove these elements from the soil, you create a clean and favorable environment for your grass seed to grow. This initial preparation will contribute to the overall health and appearance of your lawn in the long run.
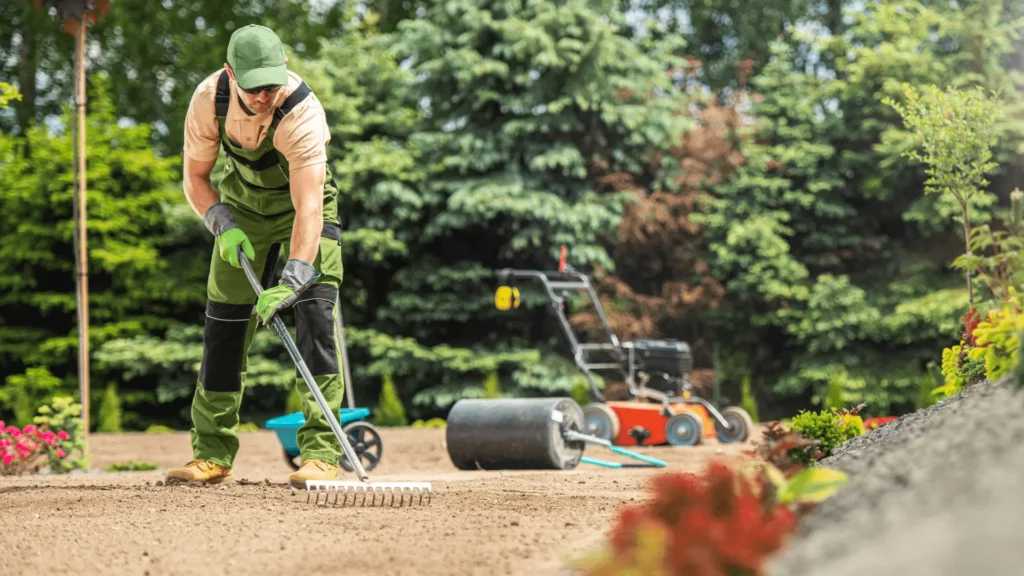
Loosening and Leveling the Soil
Loosening and leveling the soil is a crucial step in preparing the optimal foundation for your grass seed. By creating an even and stable surface, you provide the seed with the best opportunity for successful germination and growth.
There are several benefits to loosening and leveling the soil:
1. Improved seed-to-soil contact: Loosening the soil ensures better contact between the seed and the soil particles, allowing for effective nutrient and moisture absorption during germination.
2. Enhanced water drainage: Properly leveled soil promotes adequate water drainage, preventing waterlogged conditions that can hinder seed germination.
3. Uniform growth: Leveling the soil eliminates high and low spots, resulting in consistent moisture distribution and uniform growth of the grass seed.
To achieve optimal results, follow these steps:
1. Remove any large rocks, weeds, and debris from the area to create a clean surface for leveling.
2. Use a rake or garden fork to break up compacted soil, allowing for improved aeration and root penetration.
3. Smooth out the soil using a garden rake or leveling tool, ensuring an even and flat surface for seeding.
Remember, ensuring proper soil leveling and compaction is essential for a healthy and vigorous lawn. By taking the time to properly prepare the soil, you set the stage for lush and beautiful grass growth.
Also read: The Ultimate Guide to Soil Preparation for Your Garden
Fertilizing the Soil
Fertilizing the soil is a crucial step in preparing your soil for successful grass seed germination and growth. By providing the right nutrients, you can ensure optimal nutrient availability for the grass seed, enabling it to develop strong, healthy roots and establish a lush and vibrant lawn. Here are some recommendations for fertilizing the soil:
1. Conduct a Soil Test
Before applying fertilizers, it’s important to conduct a soil test to determine the nutrient levels and pH of your soil. This will help you identify any deficiencies or imbalances that need to be addressed. You can obtain a soil testing kit from your local county extension office or hire a professional soil testing service for accurate results.
2. Choose the Right Fertilizer
Based on the soil test results, select a fertilizer that matches the nutrient requirements of the grass seed. Look for a balanced fertilizer with nitrogen (N), phosphorus (P), and potassium (K) in the ratio recommended for your grass type. Slow-release fertilizers are generally preferred as they provide a steady supply of nutrients over time.
3. Follow Application Guidelines
Apply the fertilizer according to the manufacturer’s instructions. Use a spreader to ensure even distribution across the lawn area. Be careful not to overapply, as excessive fertilization can lead to nutrient imbalances or environmental pollution.
4. Time the Application
Apply the fertilizer before seeding or immediately after seeding, but be cautious not to directly contact the seed with high concentrations of fertilizer, as it may damage the germinating seedling. Follow the recommended timing on the fertilizer package or seek guidance from your local county extension office.
5. Watering After Application
To activate the fertilizer and promote nutrient uptake, water the lawn after fertilization. This will help the nutrients penetrate into the soil and reach the root zone of the grass seed. Follow proper watering practices to avoid excessive runoff or leaching.
Remember, proper fertilization is just one aspect of soil preparation for grass seed. Combine it with other essential steps like soil testing, amending the soil, and proper watering techniques to create the best possible soil foundation for your grass seed, resulting in a healthy and thriving lawn.
Seeding the Lawn
When it comes to seeding your lawn, using proper techniques is key to achieving successful grass seed germination and growth. This section will guide you through the steps and considerations to ensure optimal results.
Selecting the Right Grass Seed
Before you start seeding, it’s important to choose the right grass seed for your specific needs. Consider factors such as your climate, soil type, and intended use of the lawn. Different grass species and varieties have varying requirements and characteristics, so take the time to research and select the most suitable grass seed for your lawn.
Seeding Rate and Distribution
Determining the correct seeding rate is crucial for achieving an even and dense lawn. The recommended seeding rate can vary depending on the grass species and the desired outcome. It’s important to follow the instructions on the grass seed product’s label for the appropriate seeding rate.
To ensure even distribution, divide the total amount of grass seed into two equal halves. Spread the first half of the seed using a broadcast spreader, walking in one direction, and then spread the second half walking at a right angle to the first pass. This cross-hatch pattern will help achieve better coverage and avoid uneven patches.
Seeding Methods
There are several different methods you can use for seeding your lawn, including overseeding, slit-seeding, and hydroseeding. The method you choose will depend on the condition of your existing lawn and the results you want to achieve.
– Overseeding is the process of spreading grass seed over an already established lawn to improve density and fill in thin or bare areas. This method is commonly used for maintaining and rejuvenating an existing lawn.
– Slit-seeding involves using a specialized machine that cuts small grooves in the soil and deposits the grass seed directly into them. This method is often used for establishing a new lawn or repairing large areas of bare soil.
– Hydroseeding is a process where a mixture of grass seed, water, mulch, and fertilizers is sprayed onto the soil surface. This method promotes quick germination and provides a protective layer for the seed, making it especially useful for steep slopes or large areas.
After Seeding
Once you have finished seeding, lightly rake the area to ensure good seed-to-soil contact. This will help the seeds establish roots and germinate more effectively. Consider covering the seeded area with a thin layer of straw or erosion control blanket to protect against erosion, retain moisture, and improve seed germination.
Watering and Patience
Watering is crucial for the success of your grass seed. Keep the seeded area consistently moist by lightly watering it multiple times a day, especially during hot and dry periods. Avoid excessive watering that can lead to runoff or waterlogging.
It’s important to note that grass seed germination can take anywhere from 7 to 21 days, depending on the grass species and environmental conditions. Be patient and continue proper watering and maintenance throughout the germination period. Avoid foot traffic on the newly seeded area until the grass has established strong roots.
By following these proper seeding techniques, you can give your grass seed the best chance to thrive and establish a lush and healthy lawn. Remember to consult the specific guidelines and instructions provided by the grass seed product manufacturer for optimal results.
Watering and Maintenance Tips
Proper watering and maintenance are crucial for the successful establishment of a newly seeded lawn. Follow these best practices to ensure proper moisture levels and encourage healthy grass growth.
1. Watering Schedule
– Water the seeded area daily or as needed to keep the soil consistently moist. Avoid overwatering, as it can lead to shallow root growth and increased vulnerability to diseases.
– Use a sprinkler or a gentle watering wand to distribute water evenly across the lawn. Avoid using a strong stream of water that can displace the seeds.
2. Deep Watering
– Make sure to water deeply to encourage deep root development. This helps the grass withstand drought conditions and promotes a healthier lawn.
– Aim for a depth of at least 4-6 inches when watering. Use a rain gauge or a shallow container placed on the lawn to measure the water depth.
3. Morning Watering
– Water the lawn in the morning to allow the grass blades to dry throughout the day. This helps prevent the growth of fungus and other lawn diseases.
– Morning watering also minimizes water evaporation, ensuring that the grass receives sufficient moisture.
4. Avoid Overwatering
– Overwatering can lead to shallow root growth and poor grass establishment. It can also create favorable conditions for weed growth.
– Monitor the soil moisture regularly and adjust your watering schedule accordingly. A moisture meter can be helpful in determining the soil’s moisture content.
5. Gradual Reduction of Watering
– Gradually reduce the frequency of watering as the grass establishes and grows stronger. This promotes deeper root growth and resilience to drought conditions.
– Transition to a regular watering schedule based on the specific needs of your grass type and local climate.
6. Mowing Tips
– Wait until the grass reaches a height of 3-4 inches before the first mowing. Ensure that the mower blades are sharp to prevent tearing or damaging the newly sprouted grass.
– Set the mower to a recommended mowing height for your grass type to promote healthy growth.
Remember, proper watering and maintenance are essential for establishing a healthy and vibrant lawn. Follow these tips to create optimal growing conditions for your newly seeded lawn and enjoy the results of your hard work.
Keep in mind that these practices may vary depending on your specific lawn conditions and local climate. Adjust your watering and maintenance routine accordingly.
For more detailed guidance, refer to the instructions on the grass seed product’s label or consult your local county extension office for personalized advice.
Also read: The Ultimate Guide to Fertilizing Soil for Healthy Plant Growth
Protecting the Seeded Area
Establishing a beautiful, thriving lawn requires more than just properly preparing the soil and sowing the grass seed. Once you’ve carefully seeded your lawn, it’s essential to protect the seeded area from potential threats such as foot traffic, animals, and erosion. By implementing the following strategies, you can ensure the success of your grass seed germination and promote healthy growth.
Limit Foot Traffic
Minimizing foot traffic on the newly seeded area is crucial during the germination and establishment phase. Encourage family members, visitors, and pets to avoid walking on the seeded area. Place temporary barriers or signs to remind everyone to stay off the freshly sown lawn. Divert foot traffic to alternative pathways or designated areas to prevent compacting the soil and damaging the developing seedlings.
Animal Deterrent Measures
Animals, such as birds, squirrels, and even domestic pets, can be attracted to the newly seeded area. Their presence can disrupt the grass germination process and result in uneven growth. Install physical barriers like garden netting or bird netting to deter animals from accessing the seeded area. Additionally, consider using animal repellents or natural deterrents suggested by local gardening experts to discourage unwanted visitors.
Prevent Erosion
Erosion can wash away the soil and disrupt the evenly dispersed grass seed. Take preventative measures to control erosion in the seeded area. Mulching with straw or erosion control blankets can help stabilize the soil and prevent soil erosion caused by heavy rainfall or wind. These protective layers retain moisture, provide insulation, and safeguard the seedlings from external disturbances.
By implementing these strategies to safeguard the freshly sown grass seed, you are creating the best possible environment for successful germination and growth. Remember to monitor the seeded area regularly and make any necessary adjustments to ensure optimal protection. With proper care and attention, your grass seed will sprout into a lush and vibrant lawn.
Timing and Seasonal Considerations
When it comes to preparing the soil and seeding your lawn with grass, timing and seasonal considerations play a crucial role in ensuring successful growth and establishment. The best time to prepare the soil and seed your lawn depends on the local climate and the type of grass you plan to cultivate.
In general, the ideal time for soil preparation and seeding is during the early spring or fall. These seasons provide optimal conditions for grass seed germination and growth. During spring, the soil temperature is rising, and moisture levels are generally favorable. Similarly, fall offers cooler temperatures and more consistent rainfall, creating an ideal environment for grass seed to take root.
To determine the exact timing, it’s important to consider the specific grass type you’re planning to grow. Cool-season grasses, such as Kentucky bluegrass or tall fescue, thrive in cooler climates and should be seeded in early spring or early fall. Warm-season grasses, like Bermuda grass or zoysia grass, perform best when seeded in late spring or early summer when soil temperatures are consistently warm.
Consulting local experts, such as your county extension office, can provide valuable insights into the most suitable planting time for your specific region. Additionally, always refer to the instructions on your chosen grass seed product’s label, as they often provide specific guidelines based on the grass type and your geographic location.
Remember, proper timing is vital to ensure that your grass seed has the best opportunity for successful germination and establishment. By aligning your soil preparation and seeding with the appropriate seasons, you can set the stage for a flourishing and vibrant lawn.
Also read: The Ultimate Guide to Making Organic Soil for a Healthy Vegetable Garden
Conclusion
Proper soil preparation plays a crucial role in establishing a successful and vibrant lawn from grass seed. By following the steps and considerations outlined in this guide, you can create an optimal environment for grass seed germination and growth.
Here are the key points to remember:
1. Conduct a soil test: Before beginning the soil preparation process, it’s important to conduct a soil test. This will help determine the condition and nutrient levels of the soil, allowing you to make informed decisions about soil amendments and fertilization.
2. Amend the soil: Based on the soil test results and the specific needs of the grass seed, amend the soil by adding organic matter, such as compost or peat moss, to improve its structure and fertility.
3. Remove weeds and debris: Before seeding, remove any existing weeds, rocks, or debris from the soil. This will create a clean and clear surface for the grass seed to establish itself.
4. Loosen and level the soil: Use a rake or garden tiller to loosen and level the soil. This will promote better seed-to-soil contact and create an even surface for the grass seed to grow.
5. Fertilize the soil: Apply a balanced fertilizer according to the recommendations on the product’s label. This will provide essential nutrients that enhance the grass seed’s growth and development.
6. Seed the lawn: Follow proper seeding techniques, ensuring the correct seeding rate and method. This will help ensure uniform coverage and optimal germination.
7. Water and maintain: Water the newly seeded lawn regularly, keeping the soil consistently moist but not waterlogged. Follow proper watering and maintenance practices to encourage healthy grass growth.
8. Protect the seeded area: Take measures to protect the seeded area from foot traffic, animals, and erosion. Use barriers or fencing if necessary.
Remember, the success of your grass seed project relies heavily on the preparation of the soil. By giving attention to soil health and following the best practices outlined in this guide, you can achieve a lush and vibrant lawn that will be the envy of your neighborhood. Happy seeding!


You May Also Like

Budget-Friendly Garden Makeover: Creative Ideas for a Stunning Outdoor Space

A Complete Guide to Year-Round Vegetable Gardening: 10 Steps for Success