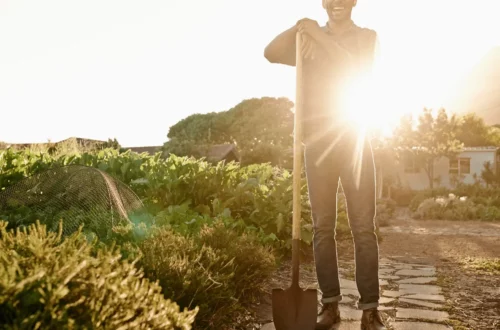
Budget-Friendly Garden Makeover: Creative Ideas for a Stunning Outdoor Space
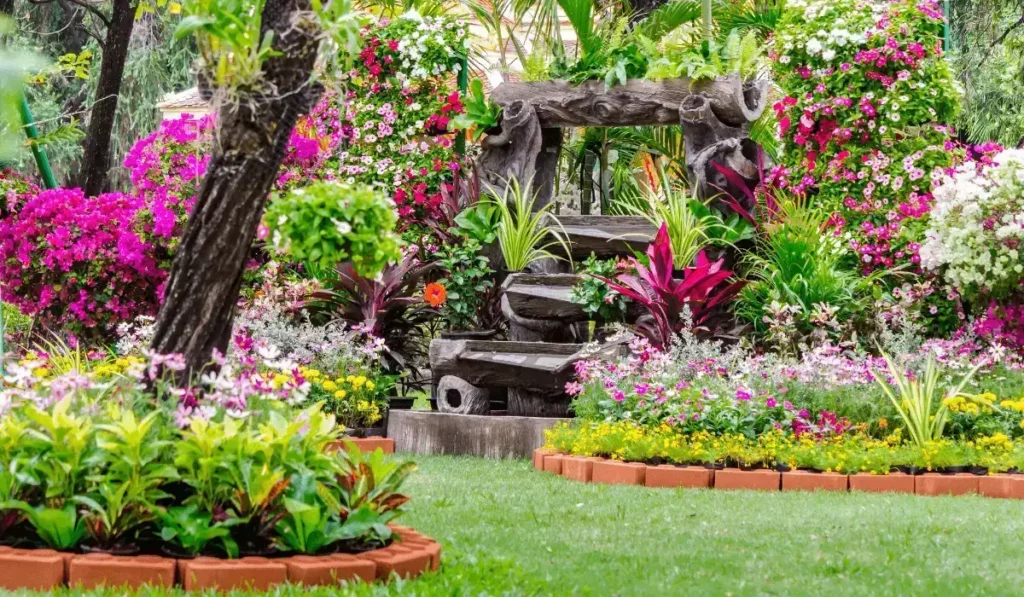
Creating a stunning garden doesn’t have to drain your bank account. With a little creativity and smart planning, you can transform your outdoor space into a beautiful oasis without breaking the budget.
Gardening on a budget is not only about saving money, but it is also an opportunity to showcase your creativity and resourcefulness. By repurposing and upcycling, you can create unique and personalized elements for your garden without spending a fortune. Additionally, by implementing cost-effective techniques and choosing affordable materials, you can achieve a breathtaking garden without compromising on quality.
Throughout this article, we will cover various ideas and tips that will enable you to make the most out of your budget. From DIY projects to smart design strategies, we will explore ideas like dramatic paint effects, plant propagation, creative storage solutions, and more.
So, whether you have a small balcony, a tiny backyard, or a spacious garden, these budget-friendly garden ideas will inspire you to create a beautiful outdoor space without breaking the bank. Let’s dive in and discover the limitless possibilities for a stunning garden on a limited budget.
Dramatic Paint Effect
A fresh coat of paint can work wonders in transforming the appearance of your outdoor furniture, fences, or walls. With just a few hours of your time and some cans of paint, you can create a dramatic and eye-catching effect in your garden. Consider using bold and vibrant colors to add a pop of personality or choose neutral tones for a more subtle and sophisticated look. Before you start painting, make sure to clean and prepare the surfaces properly to ensure a smooth finish. Don’t be afraid to get creative and experiment with different painting techniques, such as stenciling or color-blocking, to achieve a truly unique and stunning result.
Plant Up Hanging Baskets
Creating beautiful hanging baskets filled with affordable and colorful plants is a great way to add charm and vibrancy to your garden. Here are some tips to help you achieve stunning hanging baskets on a budget:
1. Choose the right plants: Opt for plants that are known for their trailing or cascading growth habits, such as petunias, lobelia, or fuchsias. These plants will create a stunning visual display as they spill over the sides of the basket.
2. Mix different varieties: Combine different types of plants with varying heights, textures, and colors to create a dynamic and eye-catching arrangement. Consider using a combination of trailing flowers, foliage plants, and even herbs for an interesting mix of scents and colors.
3. Consider foliage plants: Adding foliage plants, such as ivy or trailing vinca, can provide a lush and green backdrop for the colorful blooms in your hanging basket.
4. Use affordable options: Look for affordable options like bedding plants or small varieties that are cost-effective but still deliver a big impact. You can often find these plants at local nurseries, garden centers, or farmers’ markets.
5. Don’t forget about maintenance: Hanging baskets require regular watering and feeding to keep the plants healthy and flourishing. Be sure to choose plants that are suitable for the amount of sunlight your hanging basket receives and water them as needed.
Remember, with a little creativity and resourcefulness, you can create stunning hanging baskets on a budget. Enjoy the burst of color and beauty that they bring to your garden without breaking the bank.
Plant and Divide
One of the most cost-effective ways to create a lush garden on a limited budget is by dividing and propagating existing plants. Dividing your plants not only helps you save money on buying new ones but also allows you to expand your garden and add variety. Here are the benefits of plant division:
1. Save Money: Instead of purchasing new plants, dividing existing ones allows you to multiply your plant collection at no additional cost.
2. Expand Garden: Dividing plants creates new sections in your garden, filling empty spaces and adding visual interest.
3. Healthier Plants: Dividing plants helps rejuvenate them by removing any crowded or overgrown sections, promoting healthier growth.
4. Increase Flowering: Dividing flowering plants stimulates them to produce more blooms, resulting in a more vibrant and colorful garden.
5. Share with Others: Dividing plants also gives you the opportunity to share your favorite varieties with friends and family, spreading the joy of gardening.
To divide a plant, carefully dig it out of the ground, gently separate the root ball into smaller sections, and replant each division in a suitable location. Remember to water the divisions thoroughly and provide proper care until they establish themselves in their new spots.
By harnessing the power of plant division, you can transform your garden into a lush and diverse oasis without straining your budget.
DIY Garden Bar
Create a charming and functional DIY garden bar to elevate your outdoor entertaining space without breaking the bank. With a little creativity and some repurposed materials, you can have your own backyard oasis where you can relax and enjoy your favorite beverages.
Materials Needed
- Old wooden pallets or crates
- Plywood or plank for the bar countertop
- Recycled fence panels or wooden planks for the bar frame
- Nails or screws
- Hammer
- Saw or electric saw
- Drill
- Sandpaper
- Paint or stain
- Brushes or roller
Step 1: Planning and Preparing
Before you start building the bar, decide on the size and location that best fits your outdoor space. Measure the area and sketch out a design. Gather all the necessary materials and tools.
Step 2: Building the Bar Frame
Using the recycled fence panels or wooden planks, construct a sturdy frame for the bar. Cut the pieces to the desired lengths and connect them using nails or screws. Make sure the frame is level and secure.
Step 3: Adding the Countertop
Measure and cut the plywood or plank to fit the top of the bar frame. Sand the edges and surface to create a smooth finish. Attach the countertop to the frame using screws or nails.
Step 4: Finishing Touches
Sand the entire bar to remove any rough edges or splinters. Apply a coat of paint or stain in a color that complements your outdoor decor. You can also add a waterproof finishing wax for added protection.
Step 5: Personalize and Decorate
Once the bar is built and painted, it’s time to personalize it according to your taste. Add hooks or shelves for hanging glasses and storing bottles. Hang string lights or lanterns to create a warm ambiance. You can also decorate the bar with potted plants or hanging baskets to add a touch of greenery.
By following these simple steps, you can create a stunning and budget-friendly garden bar that will impress your guests and provide a cozy spot for outdoor gatherings. Cheers to enjoying your outdoor space in style!
Create a Cozy Outdoors
To create a cozy outdoor space that welcomes relaxation and enjoyment, it’s essential to consider seating, lighting, and accessories. Here are some budget-friendly ideas to help you transform your outdoor space into a cozy oasis:
1. Comfortable Seating:
Invest in comfortable seating options, such as outdoor cushions or bean bags, that invite you to unwind. Utilize old furniture with a fresh coat of paint or repurpose wooden pallets for a rustic touch.
2. Ambient Lighting:
Enhance the cozy atmosphere with soft, warm lighting. Hang string lights overhead, place solar-powered garden lights along pathways, and add lanterns or candles for a magical glow.
3. Cozy Accessories:
Accessorize your outdoor space with cozy blankets, throw pillows, and rugs to add warmth and texture. Incorporate potted plants, hanging baskets, and decorative lanterns to create a charming ambiance.
Remember, creating a cozy outdoors doesn’t have to break the bank. With a little creativity and careful planning, you can transform your outdoor space into a welcoming retreat without spending a fortune.
DIY Outdoor Cinema
Transforming your outdoor space into a makeshift outdoor cinema is a fun and budget-friendly way to enjoy movie nights under the stars. Follow these steps to create your own outdoor cinema experience:
1. Choose the perfect location: Find a flat area in your garden or patio that can accommodate seating arrangements and a screen.
2. Set up a projector: Invest in an affordable outdoor projector that can connect to your laptop or streaming device. Ensure it has sufficient brightness for outdoor use.
3. Create a screen: Hang a white sheet or use a blank wall as your screen. Make sure it is taut to improve image quality.
4. Arrange comfortable seating: Use blankets, pillows, or outdoor furniture to create a cozy seating area for your movie night.
5. Enhance the atmosphere: Set up fairy lights or outdoor battery lights around the seating area to create a magical ambiance.
6. Prepare audio equipment: Use portable speakers or connect your projector to an outdoor sound system to ensure clear audio.
7. Choose outdoor-friendly snacks: Pop some popcorn, prepare refreshing drinks, and offer a selection of snacks for a complete movie experience.
Remember to check the weather forecast before planning your outdoor cinema night and have a backup plan in case of rain. Enjoy a memorable movie night under the open sky with this DIY outdoor cinema setup.
Grow from Seed
Starting your garden from seeds is not only cost-effective but also a rewarding experience. Here are some tips to help you successfully grow plants from seed and save money on buying established plants.
1. Choose the Right Seeds
Select seeds that are suitable for your growing conditions, such as your climate, soil type, and amount of sunlight. Consider the growth habits and needs of the plants you want to grow.
2. Prepare Your Seeds
Follow the instructions on the seed packets for proper preparation. Soaking some seeds in warm water or scarifying them before planting can help improve germination rates.
3. Start Indoors
Many plants benefit from being started indoors before being transplanted into the garden. Use seed trays or small pots filled with seed-starting mix, providing the seeds with a warm and moist environment for germination.
4. Provide Adequate Light
Once the seeds have germinated, place them in a sunny spot or under grow lights. Proper lighting ensures that the seedlings develop sturdy stems and healthy leaves.
5. Water Wisely
Ensure the soil remains consistently moist but not waterlogged. Overwatering can lead to damping-off disease, which can kill young seedlings. Use a spray bottle or gentle watering can to avoid disturbing the delicate seedlings.
6. Transplant Carefully
When the seedlings have grown a few sets of true leaves, they are ready for transplantation. Harden them off by gradually exposing them to outdoor conditions before planting them in their final location.
7. Monitor and Maintain
Regularly check your seedlings for pests, diseases, and nutrient deficiencies. Provide them with proper care, such as watering, fertilizing, and pruning, to promote healthy growth.
Remember, starting plants from seeds requires patience and attention. It may take longer than purchasing established plants, but the cost savings and satisfaction of growing your own garden from scratch make it worthwhile. Happy seed planting!
Welcome Birds
One of the simplest and most enjoyable ways to bring life and beauty to your garden is by welcoming birds. By creating a bird-friendly environment, you can attract a variety of colorful and melodious visitors. Here are some tips to help you attract birds to your garden:
1. Install feeders: Hang bird feeders filled with a variety of seeds to provide a constant food supply.
2. Build birdhouses: Create cozy homes for birds by installing birdhouses in different parts of your garden.
3. Plant bird-friendly plants: Choose plants that provide fruits, nectar, or seeds to attract birds.
Remember, providing fresh water is also essential. Consider adding a birdbath or a small water feature for birds to drink and bathe in. With these simple steps, you can enjoy the delightful presence of birds in your garden while contributing to their well-being.
Get Creative with Storage
When it comes to maximizing storage space in your garden without breaking the bank, there are plenty of budget-friendly options to explore. By repurposing everyday objects and using recycled materials, you can create unique and functional storage solutions that add character to your outdoor space. Here are some ideas to get you started:
1. Reuse Old Furniture: Transform old chairs, dressers, or shelves into charming planters or storage units. Give them a fresh coat of paint for a vibrant and stylish look.
2. Repurpose Tin Cans: Clean and paint tin cans to create hanging or wall-mounted storage containers for tools, kitchen utensils, or small plants. Attach them to a wooden pallet for easy organization.
3. DIY Pallet Shelves: Salvage wooden pallets and convert them into rustic shelves. Mount the pallets on a wall or fence, and use them to display potted plants, garden tools, or decorative items.
4. Use Shoe Organizers: Hang a shoe organizer on a wall or fence to store small gardening tools, gloves, or seed packets. The clear pockets make it easy to find what you need.
5. Recycle Mason Jars: Attach mason jars to a wooden board or fence using hose clamps, creating a clever storage solution for small items like plant markers, seed packets, or tea lights.
Remember, the key to budget-friendly storage is to think outside the box and repurpose items you already have. With a little creativity, you can turn ordinary objects into functional and visually appealing storage options for your garden.
Grow a Lawn from Seed
Growing a lawn from seed is an affordable and rewarding way to create a lush green space in your garden. Start by preparing the soil, removing any debris and weeds, and ensuring the area is well-drained. Loosen the soil with a rake and spread a thin layer of compost to improve fertility. Next, evenly sow the grass seed using a spreader or your hands, making sure to follow the recommended seeding rate on the packaging. Lightly rake the seed into the soil and gently water to keep the topsoil moist. Regularly water and mow the lawn as it grows, and within a few weeks, you’ll have a beautiful green lawn that adds charm to your outdoor space.
Shape up
One key aspect of achieving a well-maintained and aesthetically pleasing garden is to prioritize pruning and shaping your plants. These practices not only enhance the overall appearance of your garden but also promote healthy growth and productivity. Pruning helps remove dead or diseased branches, allowing new growth to flourish. It also improves the circulation of air and sunlight, preventing the development of fungi or mold. Shaping plants through selective pruning ensures they grow in a structured and organized manner, giving your garden a neat and polished look. Remember to use proper tools and techniques to avoid damaging the plants during the pruning process. So grab your pruning shears, and let’s shape up your garden to perfection!
Use Containers for Patios
Creating a beautiful garden on a patio or balcony is easier than you might think. One budget-friendly and versatile solution is to use containers and pots. With a bit of creativity, you can transform your small outdoor space into a lush and inviting garden.
Here are some ideas to get you started:
1. Mix and Match: Choose containers of different sizes, shapes, and colors to add visual interest to your patio. Mix tall and short plants to create depth and variety.
2. Vertical Gardening: Utilize wall-mounted planters or hanging baskets to make the most of limited space. You can grow herbs, small blooms, or even trailing vines for a cascading effect.
3. Edible Delights: Plant herbs and vegetables in containers, such as tomatoes, lettuce, or peppers. Not only will you have fresh produce at your fingertips, but these plants also look beautiful and add texture to your patio.
4. Color Splash: Opt for jewel-colored plants that add vibrancy and a pop of color to your space. Think vibrant marigolds, fiery red geraniums, or deep purple petunias.
5. Versatile Options: Get creative with your choice of containers. Repurpose old buckets, wooden crates, or even colorful ceramic pots. Just make sure they have proper drainage to avoid waterlogging.
Remember to choose plants that thrive in containers and suit the lighting conditions of your patio. With a little bit of planning, containers can turn any patio or balcony into a stunning garden retreat. So let your imagination flourish and enjoy your own mini oasis without breaking the bank.
Start a Vegetable Patch
Starting a vegetable garden can be a fulfilling and cost-effective way to grow your own fresh produce. Even with a limited budget, you can create a thriving vegetable patch right in your backyard. Here’s a step-by-step guide to help you get started:
Choose Easy-to-Grow Crops
When you’re on a budget, it’s essential to select vegetables that are easy to grow and maintain. Opt for low-maintenance crops like tomatoes, lettuce, radishes, and herbs such as basil and mint. These plants are resilient and require less attention, making them perfect for beginner gardeners or those with limited time.
Utilize Recycled Containers
Instead of investing in expensive planters, repurpose old containers and items you already have at home. Try using recycled buckets, old wooden crates, or even large plastic containers as makeshift planters. Make sure to create drainage holes at the bottom to prevent waterlogging and ensure proper root health.
Prepare the Soil
Preparing the soil is crucial for the success of your vegetable patch. Ensure you have a well-draining and fertile soil mix. You can improve the soil’s fertility and structure by incorporating compost or organic matter into the planting area. This will provide essential nutrients for your plants and promote healthy growth.
Plan the Layout
Before planting, carefully plan the layout of your vegetable patch. Consider the sunlight requirements, spacing, and companion planting. By strategically arranging your crops, you can maximize space and prevent overcrowding, leading to healthier plants and higher yields.
Start from Seeds
Seeds are a budget-friendly option compared to buying seedlings or plants. Consider starting your vegetables from seeds to save money. You can find a variety of seeds at affordable prices or even save seeds from mature crops for future plantings. Follow the recommended sowing instructions on each seed packet for optimal germination.
Practice Proper Care
Once your vegetable patch is set up, it’s important to provide proper care and maintenance. Water your plants regularly, keeping the soil evenly moist but not waterlogged. Weed the garden regularly to prevent competition for nutrients and space. Mulch around the plants with organic materials like straw or wood chips to conserve moisture and suppress weed growth. Monitor for pests and diseases, and take appropriate measures to protect your plants.
Starting a vegetable patch on a budget is an excellent way to enjoy fresh, homegrown produce while saving money. By choosing easy-to-grow crops and using recycled containers, you can create a thriving garden that provides a bountiful harvest. With a little patience, care, and creativity, your vegetable patch will soon become a source of pride and delicious meals.
Also read: How to Grow a Sustainable Garden: A Beginner’s Guide
Reuse Old Furniture as Planters
If you have old furniture lying around, don’t toss it away just yet. Give it a new lease on life by repurposing it into unique and budget-friendly planters. Chairs, dressers, and even old barrels can be transformed into creative containers for your plants. Here’s how you can turn your trash into treasure:
1. Chair Planter: Remove the seat of an old chair and paint it with weather-resistant paint. Fill the seat cavity with potting soil and plant your favorite flowers or herbs. The chair back can be used as a trellis for climbing plants like ivy or morning glories.
2. Dresser Planter: Remove the drawers of an old dresser and stack them vertically. Fill each drawer with soil and plant flowers or small vegetables. The different levels of the dresser create an interesting visual display for your garden.
3. Barrel Planter: Cut a barrel in half horizontally and drill drainage holes in the bottom. Fill it with soil and plant flowers or vegetables. The barrel provides a rustic and charming aesthetic to your garden.
Remember to use plants that are suitable for the size and shape of the furniture planter. With a little creativity, you can repurpose old furniture into beautiful planters while saving money and adding a unique touch to your garden. So before you throw away that worn-out furniture, think about its potential as a planter.
Use Stake Lights to Illuminate Plants
Adding stake lights or other affordable lighting options to your garden can create a stunning visual effect and highlight the beauty of your plants. Here are some suggestions to maximize the impact:
1. Strategic Placement: Place stake lights strategically around your garden, focusing on areas where you want to draw attention to specific plants or features.
2. Path Lighting: Use stake lights to illuminate pathways, creating a safe and inviting atmosphere. Opt for solar-powered stake lights for an eco-friendly and cost-effective lighting solution.
3. String Lights: String lights can be draped over shrubs, trellises, or pergolas, creating a magical ambiance. Choose lights with warm white or soft colored bulbs for a cozy and inviting feel.
4. Spotlighting: Use stake lights with adjustable heads to direct light onto individual plants, highlighting their unique qualities and creating dramatic shadows.
Remember to consider the energy efficiency and maintenance requirements when choosing lighting options. With stake lights, you can enhance your garden’s beauty while staying within your budget.
Transform Your Dining Area with Lights
Enhancing your outdoor dining area with the right lighting solutions can create a cozy and inviting atmosphere, perfect for enjoying meals with family and friends. Here are some budget-friendly ideas to transform your dining area:
1. String Lights:
Hang string lights above your dining table to add a warm and magical glow to the space. Opt for fairy lights or bistro-style string lights for a charming ambiance.
2. Solar-Powered Lanterns:
Place solar-powered lanterns on the table or around the dining area to provide soft, ambient lighting. These eco-friendly lights charge during the day and automatically illuminate at night.
3. Candlelit Lanterns:
Add a romantic touch to your dining area by incorporating candlelit lanterns. Choose weather-resistant lanterns and use LED candles or citronella candles to create a cozy and bug-free environment.
4. Outdoor Floor Lamps:
Invest in outdoor floor lamps that provide both functional and decorative lighting. Look for weatherproof options with adjustable brightness levels to suit different dining occasions.
5. Spotlights:
Highlight certain areas of your dining area, such as a centerpiece or a beautiful garden feature, with outdoor spotlights. These directional lights create a focal point and add visual interest to your space.
Remember to prioritize safety by ensuring all lights are designed for outdoor use and properly installed. With these lighting ideas, you can create an inviting ambiance in your outdoor dining area without breaking the bank.
Create a Path with Gravel or Stone Chippings
Adding a garden path not only enhances the visual appeal of your outdoor space but also provides a functional and organized layout. Creating a budget-friendly garden path can be achieved by using gravel or stone chippings.
1. Prepare the area: Clear the path of any debris or vegetation and level the ground.
2. Lay a weed barrier: Prevent weed growth by laying a weed-blocking fabric over the path area.
3. Spread the gravel or stone chippings: Pour a layer of gravel or stone chippings evenly along the path. Choose a size and color that complements your garden’s aesthetic.
4. Compact the surface: Use a tamper or the back of a shovel to compact the gravel or stone for a firm and stable path.
5. Add edging: Install decorative edging to contain the gravel or stone and create a clean outline for the path.
6. Maintain the path: Regularly rake the surface to keep it level and replenish any lost material.
A budget-friendly garden path created with gravel or stone chippings is not only cost-effective but also adds texture and charm to your outdoor space.
Also read: A Complete Guide to Year-Round Vegetable Gardening: 10 Steps for Success
DIY Pond
Creating a small DIY pond in your garden can add a touch of tranquility and beauty to your outdoor space. Follow these step-by-step instructions to create your own budget-friendly pond:
1. Choose the location: Select a spot in your garden that receives partial sunlight and is away from overhanging trees and plants.
2. Mark the shape: Use a hose or rope to outline the shape of your pond. Experiment with different shapes until you find the one that suits your space.
3. Dig the hole: Start digging the hole according to your marked shape. Make sure to create varying depths for different aquatic plants and creatures.
4. Line the hole: Use a strong pond liner to line the hole, ensuring it extends over the edges for stability. Smooth out any wrinkles and remove air pockets.
5. Add rocks and plants: Place rocks around the edges to create a natural look. Add aquatic plants, such as water lilies or water hyacinths, to provide shade and oxygen.
6. Fill the pond: Fill the pond with water, preferably from a rain barrel or a dechlorinated water source. Allow the water to settle for a day or two before adding fish or other aquatic life.
7. Maintain the pond: Regularly clean the pond by removing debris, and monitor water levels and quality. Add beneficial bacteria to keep the water balanced and prevent algae growth.
Enjoy the soothing sounds and peaceful ambience of your own DIY pond without spending a fortune.
Make Your Own Compost
Composting is not only an environmentally-friendly practice but also a budget-friendly way to enrich your garden soil. By starting your own compost pile or bin, you can make use of kitchen scraps, yard waste, and other organic matter that would otherwise end up in the landfill. Here are a few simple steps to get you started:
1. Choose a suitable location: Find a spot in your garden or yard where you can set up your compost pile or bin. Ideally, it should be easily accessible and receive partial sunlight.
2. Gather composting materials: Collect kitchen scraps like vegetable peels, coffee grounds, and eggshells, as well as yard waste such as leaves, grass clippings, and small twigs. Avoid adding meat, dairy, or oily items that could attract pests.
3. Layer the materials: Start layering the organic matter in your compost pile, alternating between wet (food scraps) and dry (leaves) materials. This helps create a balanced ratio of carbon to nitrogen.
4. Turn and aerate the pile: Every few weeks, use a pitchfork or garden fork to turn the contents of your compost pile. This helps aerate the compost, allowing beneficial microorganisms to break down the materials faster.
5. Maintain moisture levels: Keep the compost pile moist but not too wet. If it’s too dry, sprinkle some water; if it’s too wet, add dry leaves or shredded newspaper to absorb excess moisture.
6. Be patient: Composting is a natural process that takes time. Depending on the materials used and the conditions, it can take several months to a year for the compost to fully decompose.
By making your own compost, you’ll not only save money on buying fertilizers but also create nutrient-rich soil for your plants. Plus, you’ll be reducing waste and doing your part for the environment. So start composting today and watch your garden thrive!
Remember, composting is a continual process, so keep adding organic materials as you generate them. In time, you’ll have a steady supply of nutrient-rich compost to feed your garden.
Also read: Creating a Pollinator Garden: 10 Essential Tips
Use Corks as Plant Markers
Looking for a creative and budget-friendly way to mark plants in your garden? Look no further than wine corks! Not only are they readily available, but they can also add a touch of charm to your garden. Here’s how you can repurpose wine corks into plant markers:
1. Gather wine corks: Save corks from your favorite wines or ask local restaurants for their discarded corks.
2. Label the corks: Use a permanent marker or small wooden letters to write the names of your plants on the corks.
3. Insert them into the soil: Stick the labeled corks into the ground near each plant, ensuring they are visible and easy to read.
This simple DIY idea not only helps you identify your plants but also adds a playful and eco-friendly touch to your garden.


You May Also Like

15 Game-Changing Eco Friendly Herbicides & Eco Friendly Pesticides for Your Garden
Understanding Sustainable Horticulture: A Guide to Environmentally-Friendly Plant Growth
